Making GDTF Files in SDC
Posted: Mon Jul 20, 2026 12:15 pm
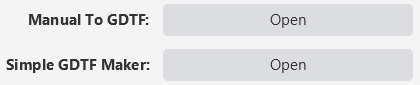
SDC has two ways to make GDTF Files yourself. Both live on the Add Fixture page, under "Manual To GDTF:" and "Simple GDTF Maker:".
Manual To GDTF
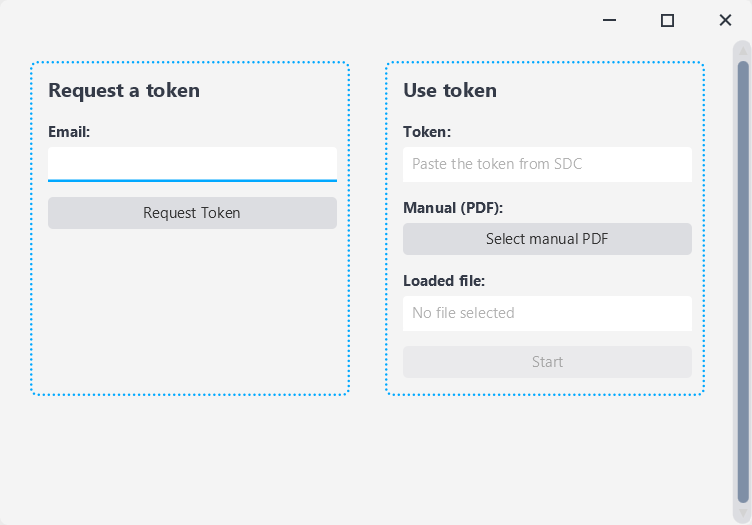
If you have the PDF manual that came with your fixture, this does the work for you. It reads the channel tables, the DMX modes and the wheel information out of the manual and hands you a finished fixture file.
It runs on our server rather than on your PC, so it uses a token. Enter your email address under "Request a token" and press "Request Token", and the token arrives in your inbox. You get two free ones. Once they are gone a link appears to buy more.
Paste the token in, press "Select manual PDF", pick your manual, and press "Start". It takes a couple of minutes and you will see it working through the manual mode by mode, so leave the window alone while it runs.
One thing to check before you start: the manual has to be a real PDF with text in it. If yours is a scan or a set of page photos there is nothing to read and you will get nothing useful back. Right-click the PDF and try selecting some text - if you cannot, use the Simple GDTF Maker instead.
When it is done you get a preview of what it found: the fixture name, the pan and tilt ranges, the colors, and a table for every DMX mode.
Gobos images are the one thing it cannot get from a manual. It knows how many slots your gobo wheel has and what they are called, but the pictures have to come from you, so each slot sits empty showing "paste". Take a screenshot of the gobo pictures in your manual, crop it to one gobo, click the slot and press Ctrl+V. Arrow keys nudge it if it sits off centre. If your gobos are white shapes on black, tick "Gobos are on a black background" so the edges trim properly.
You do not have to do the gobos images. Skip them and the wheel still works, you just get no pictures on your gobo palettes.
Simple GDTF Maker
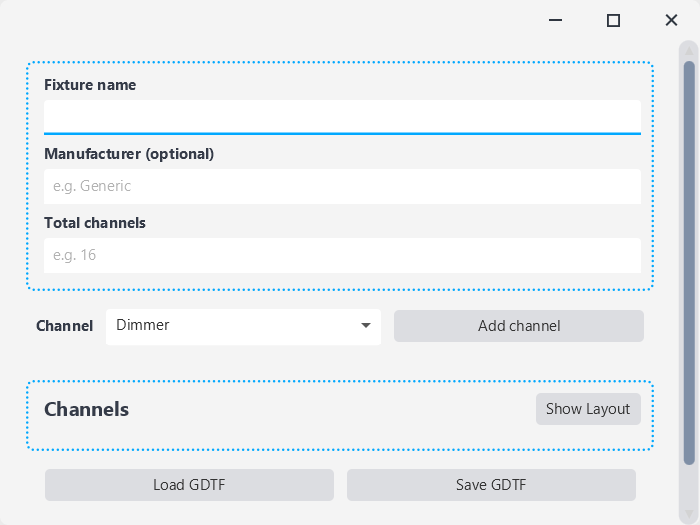
The Simple GDTF Maker is for when the converter cannot read it: a scanned manual, a photographed one, or a channel list you only have on paper. It is also the quicker choice for a simple fixture that is not worth spending a token on.
Give the fixture a name and tell it how many channels the fixture uses. Then work down your manual's channel list, picking each function from the dropdown, pressing "Add channel", and typing in the channel number it sits on. The dropdown covers everything normal - dimmer, pan and tilt with their fine channels, color mixing, color and gobo wheels, shutter, zoom, focus, iris, frost, prism, gobo wheel rotation - and "Other channel" for anything odd, where you type in your own name for it.

You do not have to define all of them, but be clear about what you give up. A channel you leave out keeps its slot, so the addressing stays correct, but in SDC it shows up as nothing more than a channel number. It has no name and no function, which means the rest of the program cannot reach it - effects, palettes, color mixing and pan/tilt control all work from a channel's function, so a channel without one can never be part of them.
That is what makes the layout table worth reading carefully before you save. Anything you want SDC to actually drive - dimmer, pan, tilt, color, gobo, shutter, zoom - has to be defined. The ones you can safely leave out are the channels you would never touch during a show anyway, like reset or the built-in auto programs.
Pan and Tilt also ask for the movement range in degrees. The manual usually states it, and the boxes come pre-filled with the common 540 and 270 if it does not.
Color and gobo wheels are worth the extra minute. Add a preset for each slot on the wheel, give it a name and the DMX value that selects it, and SDC turns those into ready-made palettes. Type "deep red" and the swatch colors itself, or click the swatch and pick the color by hand.
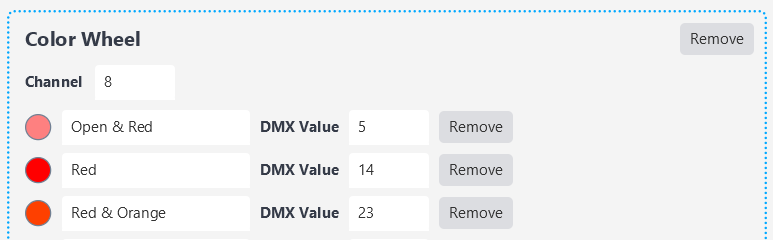
Gobo slots take a picture the same way as the converter does. Each gobo row has the circle on the left, then the name and the DMX value that selects it. Click the circle, press Ctrl+V, and the picture from your clipboard drops in. Arrow keys nudge it if it sits off centre. The picture belongs to the row it sits on, so the DMX value on that row is the one SDC shows it for - line those two up and your gobo palette comes out with the right picture on the right button. Paste only works with the circle selected, not while you are typing in a name or a DMX box. Two rows cannot share a DMX value, and a row with neither a name nor a value is left out.
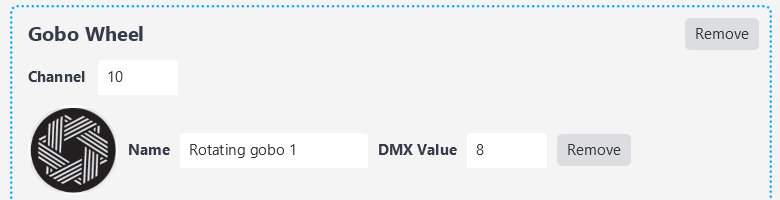
Here the gobo picture is trimmed against a white background, so paste dark gobos on white rather than white shapes on black.
Show Layout
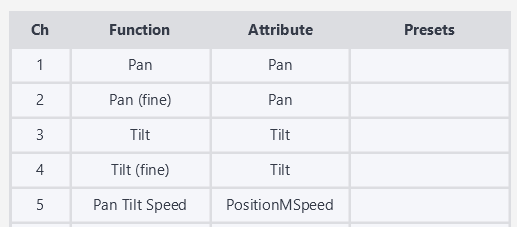
As you add channels it is easy to lose track of what has landed where, so the Simple GDTF Maker gives you a plain view of the finished fixture. Press "Show Layout" in the Channels section and a window opens listing every channel from 1 up to the total you set.
Each row shows the channel number, the function on it, the GDTF attribute it will be saved as, and any presets you have added to that channel. A channel you have not defined yet shows an empty row, which is the quickest way to spot a gap before you save. Where you have used a fine channel, the second one is marked "(fine)" so you can see the pair belongs together. Color and gobo preset names are listed on the coarse channel's row.
Leave the window open while you work. It rebuilds itself as you edit, so you can add a channel in the main window and watch it appear in the layout. Nothing in the table can be edited - it is there to check against your manual, one row at a time, before you press "Save GDTF".
Overview

The grid at the bottom shows your fixture channel by channel as you build it, so you can see at a glance whether anything is missing or doubled up. If you press "Save GDTF" and something is wrong, the line at the bottom tells you what and clears itself once you fix it.
You can also open a GDTF file you already have with "Load GDTF" and change it - useful when a downloaded file is nearly right but has a channel wrong.
Using your new file
Neither maker adds the fixture to SDC by itself, it just saves the file. Go back to the Add Fixture page, press "Select GDTF File", load the file you made, and carry on as normal.
Tip: even a rough conversion beats starting from nothing. Run the manual through the converter first, and if it gets something wrong, open the saved file in the Simple GDTF Maker and fix that one channel instead of building the whole fixture by hand.
Manual To GDTF
If you have the PDF manual that came with your fixture, this does the work for you. It reads the channel tables, the DMX modes and the wheel information out of the manual and hands you a finished fixture file.
It runs on our server rather than on your PC, so it uses a token. Enter your email address under "Request a token" and press "Request Token", and the token arrives in your inbox. You get two free ones. Once they are gone a link appears to buy more.
Paste the token in, press "Select manual PDF", pick your manual, and press "Start". It takes a couple of minutes and you will see it working through the manual mode by mode, so leave the window alone while it runs.
One thing to check before you start: the manual has to be a real PDF with text in it. If yours is a scan or a set of page photos there is nothing to read and you will get nothing useful back. Right-click the PDF and try selecting some text - if you cannot, use the Simple GDTF Maker instead.
When it is done you get a preview of what it found: the fixture name, the pan and tilt ranges, the colors, and a table for every DMX mode.
Gobos images are the one thing it cannot get from a manual. It knows how many slots your gobo wheel has and what they are called, but the pictures have to come from you, so each slot sits empty showing "paste". Take a screenshot of the gobo pictures in your manual, crop it to one gobo, click the slot and press Ctrl+V. Arrow keys nudge it if it sits off centre. If your gobos are white shapes on black, tick "Gobos are on a black background" so the edges trim properly.
You do not have to do the gobos images. Skip them and the wheel still works, you just get no pictures on your gobo palettes.
Simple GDTF Maker
The Simple GDTF Maker is for when the converter cannot read it: a scanned manual, a photographed one, or a channel list you only have on paper. It is also the quicker choice for a simple fixture that is not worth spending a token on.
Give the fixture a name and tell it how many channels the fixture uses. Then work down your manual's channel list, picking each function from the dropdown, pressing "Add channel", and typing in the channel number it sits on. The dropdown covers everything normal - dimmer, pan and tilt with their fine channels, color mixing, color and gobo wheels, shutter, zoom, focus, iris, frost, prism, gobo wheel rotation - and "Other channel" for anything odd, where you type in your own name for it.
You do not have to define all of them, but be clear about what you give up. A channel you leave out keeps its slot, so the addressing stays correct, but in SDC it shows up as nothing more than a channel number. It has no name and no function, which means the rest of the program cannot reach it - effects, palettes, color mixing and pan/tilt control all work from a channel's function, so a channel without one can never be part of them.
That is what makes the layout table worth reading carefully before you save. Anything you want SDC to actually drive - dimmer, pan, tilt, color, gobo, shutter, zoom - has to be defined. The ones you can safely leave out are the channels you would never touch during a show anyway, like reset or the built-in auto programs.
Pan and Tilt also ask for the movement range in degrees. The manual usually states it, and the boxes come pre-filled with the common 540 and 270 if it does not.
Color and gobo wheels are worth the extra minute. Add a preset for each slot on the wheel, give it a name and the DMX value that selects it, and SDC turns those into ready-made palettes. Type "deep red" and the swatch colors itself, or click the swatch and pick the color by hand.
Gobo slots take a picture the same way as the converter does. Each gobo row has the circle on the left, then the name and the DMX value that selects it. Click the circle, press Ctrl+V, and the picture from your clipboard drops in. Arrow keys nudge it if it sits off centre. The picture belongs to the row it sits on, so the DMX value on that row is the one SDC shows it for - line those two up and your gobo palette comes out with the right picture on the right button. Paste only works with the circle selected, not while you are typing in a name or a DMX box. Two rows cannot share a DMX value, and a row with neither a name nor a value is left out.
Here the gobo picture is trimmed against a white background, so paste dark gobos on white rather than white shapes on black.
Show Layout
As you add channels it is easy to lose track of what has landed where, so the Simple GDTF Maker gives you a plain view of the finished fixture. Press "Show Layout" in the Channels section and a window opens listing every channel from 1 up to the total you set.
Each row shows the channel number, the function on it, the GDTF attribute it will be saved as, and any presets you have added to that channel. A channel you have not defined yet shows an empty row, which is the quickest way to spot a gap before you save. Where you have used a fine channel, the second one is marked "(fine)" so you can see the pair belongs together. Color and gobo preset names are listed on the coarse channel's row.
Leave the window open while you work. It rebuilds itself as you edit, so you can add a channel in the main window and watch it appear in the layout. Nothing in the table can be edited - it is there to check against your manual, one row at a time, before you press "Save GDTF".
Overview
The grid at the bottom shows your fixture channel by channel as you build it, so you can see at a glance whether anything is missing or doubled up. If you press "Save GDTF" and something is wrong, the line at the bottom tells you what and clears itself once you fix it.
You can also open a GDTF file you already have with "Load GDTF" and change it - useful when a downloaded file is nearly right but has a channel wrong.
Using your new file
Neither maker adds the fixture to SDC by itself, it just saves the file. Go back to the Add Fixture page, press "Select GDTF File", load the file you made, and carry on as normal.
Tip: even a rough conversion beats starting from nothing. Run the manual through the converter first, and if it gets something wrong, open the saved file in the Simple GDTF Maker and fix that one channel instead of building the whole fixture by hand.