SDC's interface is divided into three sections that sit side by side. From left to right: the Menu, the Center Pages, and the Masters section. All three are connected by resizable dividers, so you can adjust each section to fit your workflow and screen size.
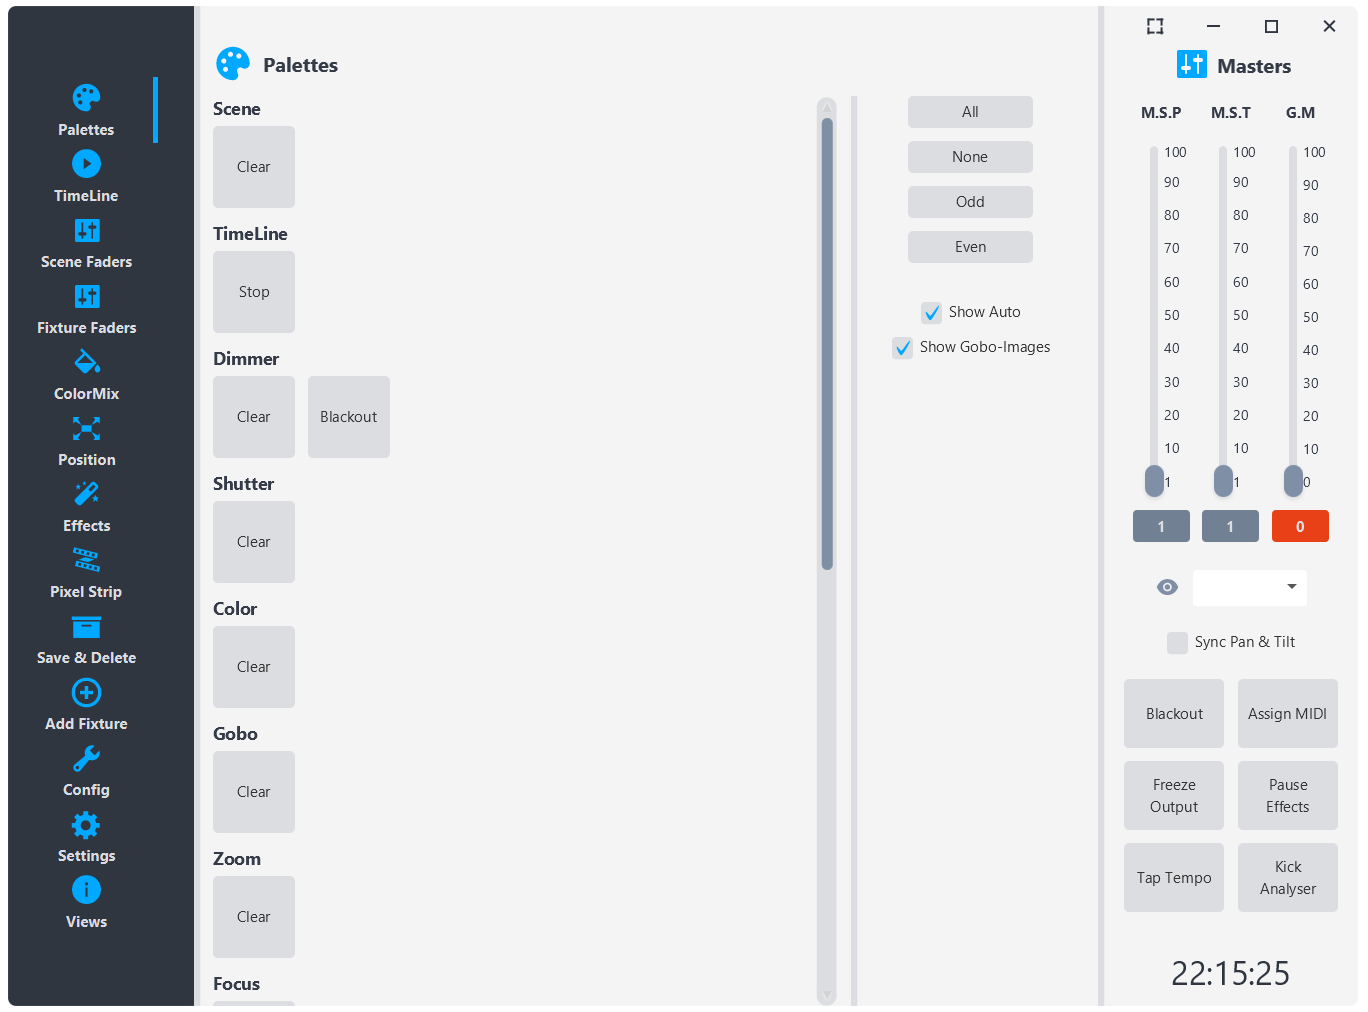
The image above shows the Palettes page on a fresh load — no fixtures added, no palettes saved. Even empty, it gives you a clear picture of how the three sections are laid out.
The Menu (Left Section)
The left section is the navigation menu. Each button switches the center area to a different page. The pages are listed from top to bottom:
Palettes: Where you recall and manage saved palettes (lighting presets). This is the default landing page.
TimeLine: Sequence palettes as timed cues with transitions for automated playback.
Scene Faders: Vertical faders that each trigger a saved palette, for live mixing between looks.
Fixture Faders: Individual channel-level faders for every fixture in your project.
ColorMix: RGB color mixing controls for your fixtures.
Position: Pan and tilt movement controls, static positioning, and XY grid.
Effects: Chase, dimmer, shutter, and other parametric effects for your fixtures.
Pixel Strip: Controls for individually addressable LED strips with 1D and 2D effects.
Save & Delete: Save your current control states as palettes, scene faders and chases or delete existing ones.
Add Fixture: Add new fixtures to your project using GDTF fixture definitions or simple SDC fixture definitions.
Fixture Config: Configure pan tilt invert, pixel strips and delete fixtures.
Settings: Application settings including DMX interface setup, Art-Net configuration, and MIDI.
Views: Opens a popup menu with additional information windows (see below).
The menu text labels are responsive. If you drag the left divider far enough to the left, the text disappears and only the icons remain. This gives you more room for the center pages when you need it.

On smaller screens (below 800 pixels tall), the menu switches to a compact mode automatically to fit all buttons without scrolling.
The Center Pages (Middle Section)
The center section is the main workspace. It changes based on which page you selected in the menu. Most center pages are split into two areas by a horizontal divider:
The left half contains the controls - faders, buttons, effect parameters, and whatever tools that page provides.
The right half contains the fixture selection panel. This is where you select which fixtures should be affected when you change settings. Each fixture appears with a checkbox, and you apply changes only to the checked fixtures.
This pattern is consistent across pages like Palettes, Position, Effects, Pixel Strip, and Fixture Faders. It means you can always control exactly which fixtures respond to your adjustments.
The divider between the two halves is also resizable, so you can give more space to the controls or to the fixture list depending on what you are working on.
The Masters Section (Right Section)

The far right section contains the master controls - the things you need access to at all times regardless of which page you are on.
Master Speed Pan (M.S.P): A vertical fader that overrides the pan movement speed for all fixtures that have Master Speed Control enabled in their Fixture Config. This lets you slow down or speed up all movement globally without touching each fixture's individual speed setting.
Master Speed Tilt (M.S.T): Same as above but for tilt movement.
Grand Master: The main dimmer fader. This scales the output brightness of every fixture in the project. At 100 everything outputs at full. Pulling it down dims everything proportionally.
Fixture Dropdown: A dropdown to select a specific fixture and view its master speed settings.
Sync Pan/Tilt: A checkbox that locks the Master Speed Pan and Tilt faders together so they move as one.
Blackout: A toggle button that kills all DMX dimmer output instantly. Press again to restore. This is your emergency darkness button.
Tap Tempo: Tap this button repeatedly to set the BPM for chase and effect timing. The tempo is calculated from the interval between your taps.
Freeze Output: Freezes the entire DMX output at its current state. All effects, movements, and fader changes stop having any effect on the output until you unfreeze. Useful for holding a look while you prepare the next one.
Pause Effects: Pauses all running effects without stopping them. Unlike Freeze, which locks the DMX output, Pause stops the effect engines from advancing - so when you unpause, the effects resume from where they left off.
Go Fullscreen / Exit Fullscreen: Switches SDC to fullscreen mode or back to windowed mode.
Clock: A real-time clock display at the bottom of the Masters section.
If you do not need the Masters section visible - for example, during programming when you are focused on building palettes - drag the right divider all the way to the right edge to hide it. You can always drag it back when you need it.
Views

The Views button at the bottom of the menu opens a popup with additional information windows. These windows are separate from the main interface and can be placed on a second monitor in a dual-screen setup. On a single-screen setup, they work just as well floating in front of the main window.
The available Views are:
Fixture Levels: Shows the current DMX output values for your fixtures in real time.
Fixture Status: Displays which fixtures are active and what they are doing.
Fixture RGB Color: Shows the current RGB color output of each fixture as a visual color swatch.
Set Pan & Tilt Invert: Configure pan and tilt channel inversion for your fixtures.
Set Attributes To Use In Effects: Choose which fixture attributes (gobo and color) are included when auto-effects run.
Set Single DMX Value: Manually set a specific DMX channel to a specific value. Useful for testing and troubleshooting.
Effect Status: Shows which effects are currently running.
Universe Levels: Opens a grid of numbered buttons (one per universe) that each show the live DMX channel values for that universe.
MIDI Assign: Configure MIDI mapping for buttons, faders, and controls in SDC.
The Views are designed for dual-screen setups where you keep the main interface on one screen for programming and control, and the Views on the other screen for monitoring. Having Fixture Levels or Universe Levels visible on a second monitor while you program gives you instant feedback on what your DMX output is actually doing.
Resizing
Every section boundary in SDC is a draggable divider. This includes the divider between the menu and the center pages, the divider between the center pages and the Masters section, and the divider within center pages that splits the controls from the fixture selection panel.
Drag the left divider to the left to collapse the menu down to icons only. Drag the right divider to the right to hide the Masters section entirely. Drag the center page divider to give more or less space to the fixture selection panel. SDC remembers your divider positions between sessions.