All settings are applied immediately when changed.
Art-Net Settings

The Art-Net Settings panel has two controls and an "Online Devices" list:
Enable Art-Net: Check this box to enable Art-Net output. Takes effect immediately.
Art-Net Routing: Opens the Art-Net Routing window where each universe can be pointed at a specific device on your network. See "Art-Net Routing" below for details.
Online Devices: Lists all Art-Net devices currently online on your network. Each device shows its name with a green dot when online. The list updates in real time as devices appear and disappear. Offline devices are not shown here - to see and manage offline routing assignments, open the Art-Net Routing window. If no devices are online, "No devices online" is shown.
SDC always uses ArtNet Net 0 and ArtNet Subnet 0.
Art-Net Routing
The Art-Net Routing window lets you send each of SDC's 32 universes to a specific Art-Net device. Each universe can independently be routed to a different device, or left unrouted (sends nothing). All changes are applied and saved immediately - there is no Apply or Save button.
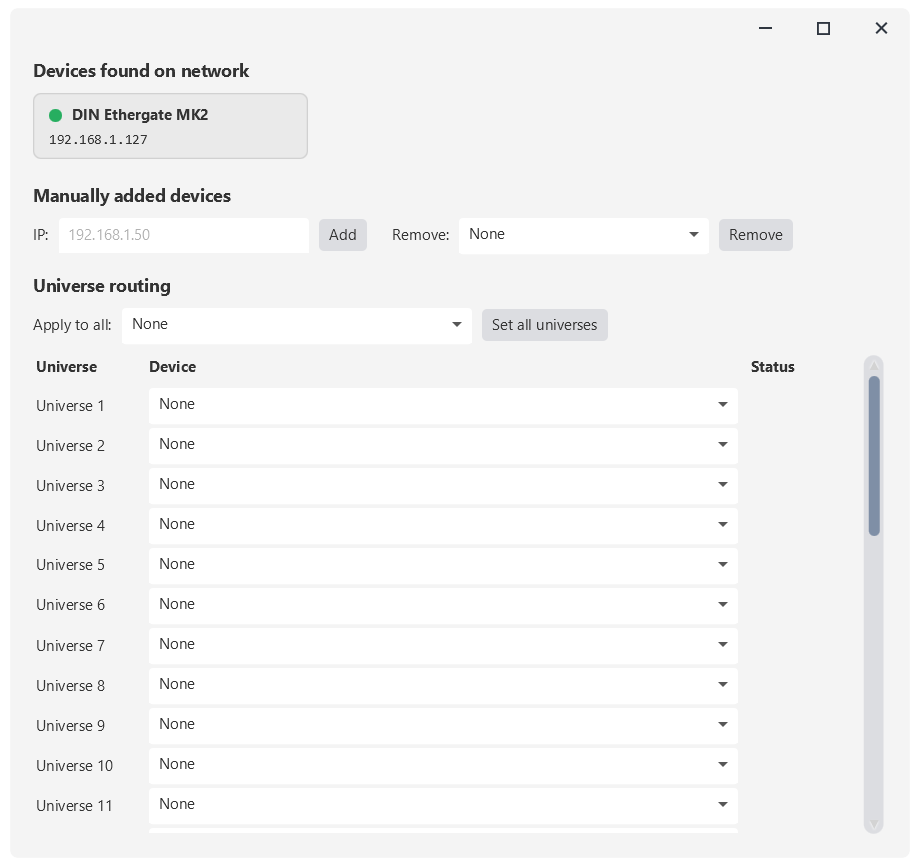
Devices found on network
The top section shows a card for each Art-Net device discovered on your network. Each card displays the device name, its IP address, and an indicator dot (green for online, grey for offline). Offline devices remain visible at reduced opacity so you can still see what was previously discovered.
Manually added devices
If a device does not respond to Art-Net discovery (ArtPoll), you can add its IP address manually. Type the IP into the "IP" field and click "Add" - the device becomes available in all the universe routing dropdowns. To remove a manually added device, select its IP from the "Remove" dropdown and click "Remove" - any universes that were routed to it are reset to "None" automatically. Manually added devices that match a discovered device are not duplicated; the discovered card takes precedence.
Universe routing
The routing table has one row per universe with three columns:
Universe: The universe number (1 to 32).
Device: A dropdown listing "None" plus all known devices (discovered and manually added). Selecting a device routes that universe to it immediately. Selecting "None" disables output for that universe.
Status: Shows whether the configured device is currently online, offline, or not set ("None").
Apply to all: Above the routing table is a shortcut. Select a device from the dropdown and click "Set all universes" to route every universe to that device at once. Useful for single-node setups where all universes go to the same device.
USB Settings
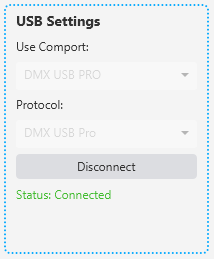
If you're using a USB-to-DMX device, select your device from the "Use Comport" dropdown and choose the correct protocol under "Protocol". Two protocols are supported:
DMX USB Pro: For Enttec DMX USB Pro and compatible interfaces.
Open DMX: For Enttec Open DMX and compatible interfaces.
Click "Connect" to connect to the selected device. The button changes to "Disconnect" when connected, and the comport and protocol dropdowns are disabled while connected. Click "Disconnect" to release the device.
The status text shows "Status: Connected" or "Status: Not connected" in real time.
In SDC, for USB to DMX devices with a built-in processor, like the Enttec DMX USB Pro, the name in the dropdown will be "DMX USB Pro", but other devices with a built-in processor may be listed as "FT232R USB UART". Select "DMX USB Pro" as the protocol under Settings → USB Settings → Protocol..
In SDC, for USB to DMX devices with no built-in processor, like the Enttec Open DMX USB, the name in the dropdown will often be "FT232R USB UART". Select "Open DMX" as the protocol under Settings → USB Settings → Protocol.

If you're having trouble connecting your USB-to-DMX device, make sure the correct drivers are installed. Then try clicking "Disconnect" followed by "Connect". If the status shows "Connected" but your lights do not respond, ensure the correct protocol is selected. As a last resort, close SDC, unplug and reconnect your USB-to-DMX device, and restart SDC. Also have a look at the section "SDC & Hardware".
DMX Controls
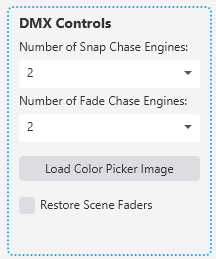
Number of Snap Chase Engines: Sets how many snap chase engines are available on the Effects page (2 to 10). Takes effect immediately.
Number of Fade Chase Engines: Sets how many fade chase engines are available on the Effects page (2 to 10). Takes effect immediately.
Load Color Picker Image: Opens a file picker to load a custom image (PNG, JPG, JPEG, BMP, or GIF) as the "User Defined" color picker on the ColorMix page. The image is saved automatically and selected as the active color picker.
Restore Scene Faders: When checked, SDC restores the scene fader positions from the last session when you start the application. This means your show picks up where you left off. Takes effect immediately.
MIDI Control

SDC supports the AKAI APC Mini MK2 MIDI controller. Simply plug in the controller - no driver installation is needed - and SDC will automatically detect it.
Connected devices: Shows the connection state of your MIDI device(s) in real time.
Test MIDI: A toggle button that tests the MIDI connection. When activated, "SDC" scrolls across the APC Mini's button grid, the lower buttons light up in red, and the right-side buttons light up in green. Press again to stop the test and restore normal button colors.
MIDI Assign: Opens the MIDI assignment window where you can map SDC controls to physical faders and buttons on your MIDI controller.
The MIDI assignment window contains two toggle buttons: "Assign" and "Unassign." When a button in SDC is selected or fader is moved and "Assign" is pressed, pressing a button or moving a fader in SDC afterward will create the mapping. When a button is pressed or a fader is moved and "Unassign" is active, pressing a control on the APC will remove its mapping.
GUI & App Info

GUI Mode: Switch between Light and Dark mode. The change is applied immediately.
The current app version number is displayed below the GUI mode selector.
Save & Load
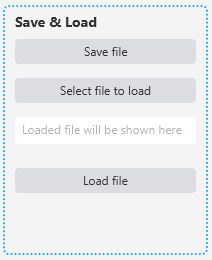
Save file: Saves your entire SDC project (all fixtures, effects, palettes, scene faders, settings, and presets) to an SDC file.
Select file to load: Opens a file picker to select an SDC project file.
Load file: Loads the selected file. SDC will ask for confirmation before loading, because loading a file replaces all existing options and presets.
The text field shows the currently selected file path.
License Info
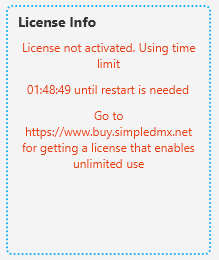
Displays your current license status. The "Activate App" button on the right side opens the activation dialog where you enter your username and password. The button is disabled when the app is already activated with a valid license.
Tips
After connecting your DMX device, verify the connection by checking the status indicator on the Settings page. A green "Status: Connected" confirms that SDC is communicating with your hardware.
SDC discovers Art-Net devices automatically. The Settings page shows online devices at a glance, while the Art-Net Routing window lets you assign each universe to a specific device. If a device does not respond to discovery, add it manually under "Manually added devices" in the routing window.
The Restore Scene Faders option is useful for live venues where you want the lights to return to the same state after a restart.